CentOS 7.7 初始化配置参考URL:CentOS 7.6 基本配置
1、安装 OpenVPN
yum -y install openvpn easy-rsa iptables-services
yum -y install openssh-server lzo openssl openssl-devel openvpn NetworkManager-openvpn openvpn-auth-ldap
1.1 安装 easy-rsa
该包用来制作ca证书,服务端证书,客户端证书。最新的为 easy-rsa3
cd /opt
wget https://github.com/OpenVPN/easy-rsa/archive/master.zip
unzip master.zip
将解压得到的文件夹 easy-rsa-master 重命名为 easy-rsa
mv easy-rsa-master/ easy-rsa
然后将的到的 easy-ras 文件夹复制到 /etc/openvpn/ 目录下
cp -R easy-rsa/ /etc/openvpn/
1.2 编辑 vars 文件
此文件为制作证书时所使用到的配置文件。
1、先进入 /etc/openvpn/easy-rsa/easyrsa3 目录
cd /etc/openvpn/easy-rsa/easyrsa3/
2、复制 vars.example 为 vars
cp vars.example vars
3、在vars末尾添加字段信息
echo "set_var EASYRSA_REQ_COUNTRY     \"CN\"
set_var EASYRSA_REQ_PROVINCE    \"HeNan\"
set_var EASYRSA_REQ_CITY        \"ZhengZhou\"
set_var EASYRSA_REQ_ORG         \"zzszxyy\"
set_var EASYRSA_REQ_EMAIL       \"184859498@qq.com\"
set_var EASYRSA_REQ_OU          \"Network Center\"
" >> /etc/openvpn/easy-rsa/easyrsa3/vars
2. 创建证书
2.1 创建服务端证书和 key
2.1.1、进入 /etc/openvpn/easy-rsa/easyrsa3/ 目录初始化
cd /etc/openvpn/easy-rsa/easyrsa3/
./easyrsa init-pki

2.1.2、创建根证书
注意这一步需要输入 PEM 密码 PEM pass phrase,输入两次。这个密码是自己创建的,一定要记住!我这里密码设置为: 123456
./easyrsa build-ca nopass # 此参数不会产生密码
还需要起个名字,common name 通用名,自己起个不重名的就可以。
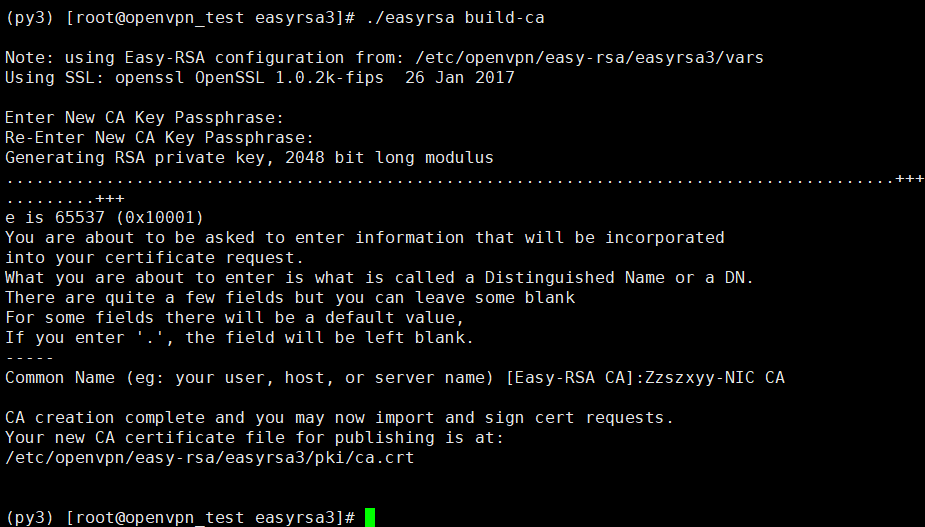
./easyrsa build-ca

Note: using Easy-RSA configuration from: /etc/openvpn/easy-rsa/easyrsa3/vars
Using SSL: openssl OpenSSL 1.0.2k-fips  26 Jan 2017

Enter New CA Key Passphrase:  ##设置密码
Re-Enter New CA Key Passphrase: ##重复输入密码
Generating RSA private key, 2048 bit long modulus
.........................................................................................+++
.........+++
e is 65537 (0x10001)
You are about to be asked to enter information that will be incorporated
into your certificate request.
What you are about to enter is what is called a Distinguished Name or a DN.
There are quite a few fields but you can leave some blank
For some fields there will be a default value,
If you enter '.', the field will be left blank.
-----
Common Name (eg: your user, host, or server name) [Easy-RSA CA]:Zzszxyy-NIC CA ## 自定义一个名字

CA creation complete and you may now import and sign cert requests.
Your new CA certificate file for publishing is at:
/etc/openvpn/easy-rsa/easyrsa3/pki/ca.crt

(py3) [root@openvpn_test easyrsa3]#

2.1.3、创建服务器端证书
这一步需要输入 server 的 common name,也是自己起一个不重名的就可以,如下:
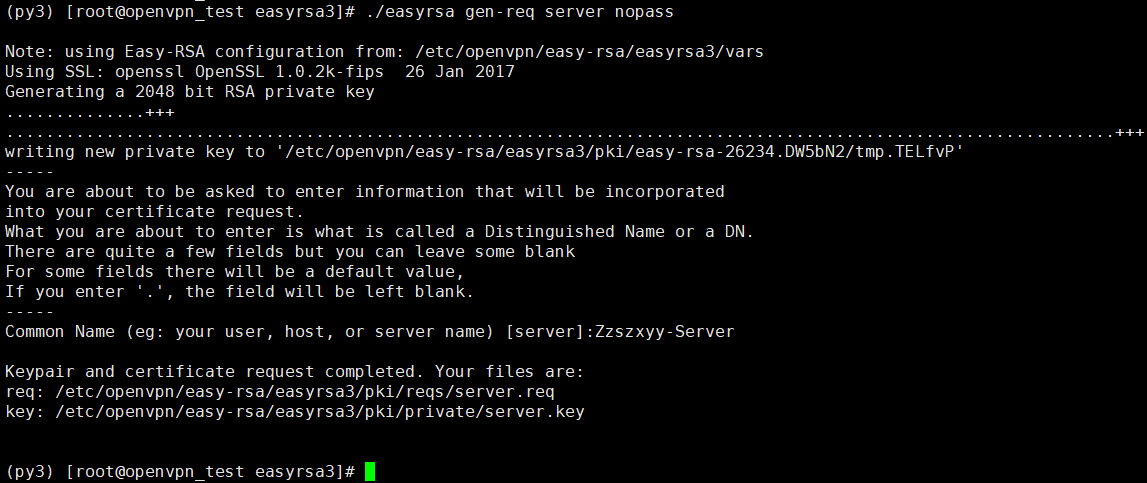
./easyrsa gen-req server nopass

Using SSL: openssl OpenSSL 1.0.2k-fips  26 Jan 2017
Generating a 2048 bit RSA private key
..............+++
...............................................................................................................+++
writing new private key to '/etc/openvpn/easy-rsa/easyrsa3/pki/easy-rsa-26234.DW5bN2/tmp.TELfvP'
-----
You are about to be asked to enter information that will be incorporated
into your certificate request.
What you are about to enter is what is called a Distinguished Name or a DN.
There are quite a few fields but you can leave some blank
For some fields there will be a default value,
If you enter '.', the field will be left blank.
-----
Common Name (eg: your user, host, or server name) [server]:Zzszxyy-Server

Keypair and certificate request completed. Your files are:
req: /etc/openvpn/easy-rsa/easyrsa3/pki/reqs/server.req
key: /etc/openvpn/easy-rsa/easyrsa3/pki/private/server.key

(py3) [root@openvpn_test easyrsa3]#

2.1.4、签发服务端证书
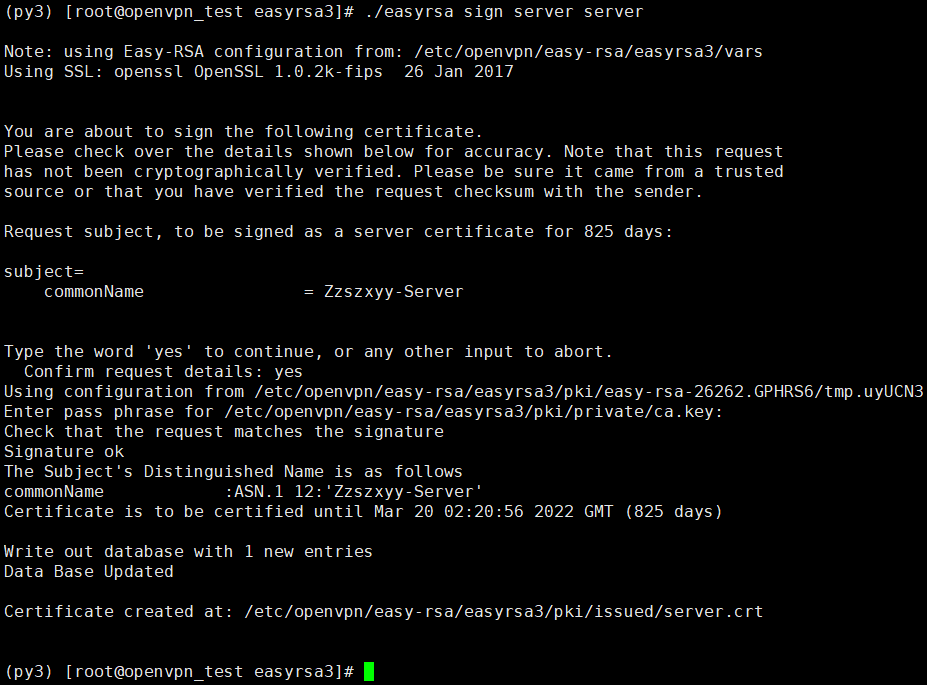
./easyrsa sign server server

Note: using Easy-RSA configuration from: /etc/openvpn/easy-rsa/easyrsa3/vars
Using SSL: openssl OpenSSL 1.0.2k-fips  26 Jan 2017


You are about to sign the following certificate.
Please check over the details shown below for accuracy. Note that this request
has not been cryptographically verified. Please be sure it came from a trusted
source or that you have verified the request checksum with the sender.

Request subject, to be signed as a server certificate for 825 days:

subject=
    commonName                = Zzszxyy-Server


Type the word 'yes' to continue, or any other input to abort.
  Confirm request details: yes  ##输入 yes
Using configuration from /etc/openvpn/easy-rsa/easyrsa3/pki/easy-rsa-26262.GPHRS6/tmp.uyUCN3
Enter pass phrase for /etc/openvpn/easy-rsa/easyrsa3/pki/private/ca.key:  ##输入生成CA证书的密码 123456
Check that the request matches the signature
Signature ok
The Subject's Distinguished Name is as follows
commonName            :ASN.1 12:'Zzszxyy-Server'
Certificate is to be certified until Mar 20 02:20:56 2022 GMT (825 days)

Write out database with 1 new entries
Data Base Updated

Certificate created at: /etc/openvpn/easy-rsa/easyrsa3/pki/issued/server.crt


(py3) [root@openvpn_test easyrsa3]#

2.1.5、创建 Diffie-Hellman,确保 key 穿越不安全网络的命令
这一步就是等的时间稍微长一点,其他没啥特别的,如下:
./easyrsa gen-dh

Note: using Easy-RSA configuration from: /etc/openvpn/easy-rsa/easyrsa3/vars
Using SSL: openssl OpenSSL 1.0.2k-fips  26 Jan 2017
Generating DH parameters, 2048 bit long safe prime, generator 2
This is going to take a long time
...
...
DH parameters of size 2048 created at /etc/openvpn/easy-rsa/easyrsa3/pki/dh.pem
2.2 创建客户端证书及 key
2.2.1、 进入 root 目录新建 client 文件夹,文件夹可随意命名,然后拷贝前面解压得到的 easy-ras 文件夹到 client 文件夹,进入下列目录
cd /root/
mkdir client
cp -R /opt/easy-rsa/ client/
cd /root/client/easy-rsa/easyrsa3/
2.2.2、初始化客户端目录
./easyrsa init-pki

init-pki complete; you may now create a CA or requests.
Your newly created PKI dir is: /root/client/easy-rsa/easyrsa3/pki
2.2.3、创建客户端key及生成证书
这里生成一个 vpnuser01 的证书,也要输入密码,这个密码是之后客户端要用的,所以不要和之前的重复了。我这里为了简单,密码设置为:666666(加上nopass 可以不提供密码: ./easyrsa gen-req vpnuser01 nopass)
./easyrsa gen-req vpnuser01

Using SSL: openssl OpenSSL 1.0.2k-fips  26 Jan 2017
Generating a 2048 bit RSA private key
............................................................................................................................................................................................................................+++
......................+++
writing new private key to '/root/client/easy-rsa/easyrsa3/pki/easy-rsa-26446.6ixkEg/tmp.FX5mva'
Enter PEM pass phrase:  ##输入自定义密码 666666
Verifying - Enter PEM pass phrase:  ##输入自定义密码 666666
-----
You are about to be asked to enter information that will be incorporated
into your certificate request.
What you are about to enter is what is called a Distinguished Name or a DN.
There are quite a few fields but you can leave some blank
For some fields there will be a default value,
If you enter '.', the field will be left blank.
-----
Common Name (eg: your user, host, or server name) [vpnuser01]: ##默认直接回车

Keypair and certificate request completed. Your files are:
req: /root/client/easy-rsa/easyrsa3/pki/reqs/vpnuser01.req
key: /root/client/easy-rsa/easyrsa3/pki/private/vpnuser01.key


(py3) [root@openvpn_test easyrsa3]#
2.2.4、将得到的 vpnuser01.req 导入然后签约证书
cd /etc/openvpn/easy-rsa/easyrsa3/
./easyrsa import-req /root/client/easy-rsa/easyrsa3/pki/reqs/vpnuser01.req vpnuser01

Note: using Easy-RSA configuration from: /etc/openvpn/easy-rsa/easyrsa3/vars
Using SSL: openssl OpenSSL 1.0.2k-fips  26 Jan 2017

The request has been successfully imported with a short name of: vpnuser01
You may now use this name to perform signing operations on this request.

2.2.5、签发客户端证书
这里生成 client 所以必须为 client,vpnuser01 要与之前导入名字一致,导入的时候会要求输入密码,这个密码是第一次设置的根证书的密码,不要输错。
./easyrsa sign client vpnuser01

Note: using Easy-RSA configuration from: /etc/openvpn/easy-rsa/easyrsa3/vars
Using SSL: openssl OpenSSL 1.0.2k-fips  26 Jan 2017


You are about to sign the following certificate.
Please check over the details shown below for accuracy. Note that this request
has not been cryptographically verified. Please be sure it came from a trusted
source or that you have verified the request checksum with the sender.

Request subject, to be signed as a client certificate for 825 days:

subject=
    commonName                = vpnuser01


Type the word 'yes' to continue, or any other input to abort.
  Confirm request details: yes
Using configuration from /etc/openvpn/easy-rsa/easyrsa3/pki/easy-rsa-2267.bpVFfB/tmp.8LpRId
Enter pass phrase for /etc/openvpn/easy-rsa/easyrsa3/pki/private/ca.key:
Check that the request matches the signature
Signature ok
The Subject's Distinguished Name is as follows
commonName            :ASN.1 12:'vpnuser01'
Certificate is to be certified until Mar 20 02:35:10 2022 GMT (825 days)

Write out database with 1 new entries
Data Base Updated

Certificate created at: /etc/openvpn/easy-rsa/easyrsa3/pki/issued/vpnuser01.crt
3. 复制证书
这一步就是拷贝这些文件放入到相应位置。将下列文件放到 /etc/openvpn/ 目录执行命令
cp /etc/openvpn/easy-rsa/easyrsa3/pki/ca.crt /etc/openvpn
cp /etc/openvpn/easy-rsa/easyrsa3/pki/private/server.key /etc/openvpn
cp /etc/openvpn/easy-rsa/easyrsa3/pki/issued/server.crt /etc/openvpn
cp /etc/openvpn/easy-rsa/easyrsa3/pki/dh.pem /etc/openvpn
将下列文件放到/root/client 目录:
cp /etc/openvpn/easy-rsa/easyrsa3/pki/ca.crt /root/client
cp /etc/openvpn/easy-rsa/easyrsa3/pki/issued/vpnuser01.crt /root/client
cp /root/client/easy-rsa/easyrsa3/pki/private/vpnuser01.key /root/client
4. 设置 OpenVPN 配置文件
安装完 openvpn 以后默认提供了一个示例配置文件位于 /usr/share/doc/openvpn-2.4.8/sample/sample-config-files 目录下名为 server.conf,我们将这个文件复制到 /etc/openvpn 目录内
cp /usr/share/doc/openvpn-2.4.8/sample/sample-config-files/server.conf /etc/openvpn/
然后修改配置 server.conf 如下:
echo "port 1194
proto tcp
dev tun
ca /etc/openvpn/ca.crt
cert /etc/openvpn/server.crt
key /etc/openvpn/server.key
dh /etc/openvpn/dh.pem
server 10.8.0.0 255.255.255.0
ifconfig-pool-persist ipp.txt

# 分配内网地址的范围
push \"route 192.168.0.0 255.255.0.0\"  # 为VPN客户端添加一条虚拟IP段到企业内网的静态路由
push \"dhcp-option DNS 8.8.4.4\"
push \"dhcp-option DNS 8.8.8.8\"

#this line will redirect all traffic through our OpenVPN
#push \"redirect-gateway def1\"

cipher AES-256-CBC
keepalive 10 120

#Enable multiple client to connect with same key
duplicate-cn

comp-lzo
max-clients 500
persist-key
persist-tun
management localhost 7505
status openvpn-status.log
verb 3
# explicit-exit-notify 1 # for UDP
" > /etc/openvpn/server.conf
默认情况下,VPN连接成功后会自动增加一些路由,并把网关设置成vpn的,所以所有的流量都会通过VPN来传送,但是如果使用openvpn,可以自己修改路由,指定某些ip走vpn,或者某些ip不走vpn,从而达到节省流量或者提高访问速度的目的。
Lans behind OpenVPN
5、启动 OpenVPN 服务
openvpn --daemon --config /etc/openvpn/server.conf

# ps -ef|grep openvpn
root      2393     1  0 10:45 ?        00:00:00 openvpn --daemon --config /etc/openvpn/server.conf

# netstat -an|grep 1194
tcp        0      0 0.0.0.0:1194            0.0.0.0:*               LISTEN
6、配置内核转发和防火墙
sed -i "s/net.ipv4.ip_forward = 0/net.ipv4.ip_forward = 1/g" /etc/sysctl.conf
sed -i '/net.ipv4.ip_forward/s/0/1/' /etc/sysctl.conf
sysctl -p

iptables -A INPUT -p tcp -m tcp --dport 1194 -j ACCEPT
iptables -t nat -A POSTROUTING -s 10.8.0.0/24  -j MASQUERADE

firewall-cmd --add-service=openvpn --permanent
firewall-cmd --add-source=10.8.0.0 --permanent
firewall-cmd --query-source=10.8.0.0 --permanent
firewall-cmd --add-masquerade --permanent
firewall-cmd --query-masquerade --permanent

firewall-cmd --zone=public --add-port=1194/tcp --permanent
firewall-cmd --zone=public --add-port=1194/udp --permanent
firewall-cmd --zone=public --add-port=1443/tcp --permanent

firewall-cmd --reload

firewall-cmd --list-all

public (active)
  target: default
  icmp-block-inversion: no
  interfaces:
  sources: 10.8.0.0
  services: dhcpv6-client dns http https openvpn ssh
  ports: 2222/tcp 1194/tcp 1194/udp 1443/tcp
  protocols:
  masquerade: yes
  forward-ports:
  source-ports:
  icmp-blocks:
  rich rules:
7、配置 OpenVPN 客户端
OpenVPN 客户端,Windows 或者 Mac 都需要客户端证书以及一个名为 .ovpn 的配置文件。
1、创建 vpnuser01.ovpn 文件
echo "client
dev tun
proto tcp
remote 149.28.205.213 1194
remote-cert-tls server
auth-nocache
resolv-retry infinite
nobind
persist-key
persist-tun
ca ca.crt
cert vpnuser01.crt
key vpnuser01.key
cipher AES-256-CBC
comp-lzo
verb 3
# askpass pass.txt
# redirect-gateway
# route-delay 2
" >  /root/client/vpnuser01.ovpn
2、下载证书和配置文件到客户端本地
cd /root/client/
sz -y ca.crt vpnuser01.crt vpnuser01.key vpnuser01.ovpn
3、将证书和配置文件放到 OpenVPN 目录
我这里使用的是 Mac 所以放到任何位置都可以,如果是 Windows 系统,则需要放置到 OpenVPN 安装目录:C:\Program Files\OpenVPN 下的 config 文件夹内然后就可以连接 OpenVPN 了。
4、连接测试
连接时需要输入客户端证书的密码
新建客户端流程
1、创建客户端key及生成证书:
cd /root/client/easy-rsa/easyrsa3/
./easyrsa gen-req vpnuser02 nopass
2、将得到的 vpnuser01.req 导入然后签约证书:
cd /etc/openvpn/easy-rsa/easyrsa3/
./easyrsa import-req /root/client/easy-rsa/easyrsa3/pki/reqs/vpnuser02.req vpnuser02
3、签发客户端证书:
./easyrsa sign client vpnuser02
4、复制证书:
cp /etc/openvpn/easy-rsa/easyrsa3/pki/issued/vpnuser02.crt /root/client
cp /root/client/easy-rsa/easyrsa3/pki/private/vpnuser02.key /root/client
4、客户端配置文件:
client
dev tun
proto tcp
remote 149.28.205.213 1194
remote-cert-tls server
auth-nocache
resolv-retry infinite
nobind
persist-key
persist-tun
ca ca.crt
cert vpnuser01.crt
key vpnuser01.key
cipher AES-256-CBC
comp-lzo
verb 3
5、自动化脚本:
cd /root/client/easy-rsa/easyrsa3/
./easyrsa gen-req xww2008 nopass<<EOF

EOF

cd /etc/openvpn/easy-rsa/easyrsa3/
./easyrsa import-req /root/client/easy-rsa/easyrsa3/pki/reqs/xww2008.req xww2008<<EOF
yes
EOF

./easyrsa sign client xww2008<<EOF
yes
EOF

cp /etc/openvpn/easy-rsa/easyrsa3/pki/issued/xww2008.crt /root/client
cp /root/client/easy-rsa/easyrsa3/pki/private/xww2008.key /root/client

cd /root/client/

echo "client
dev tun
proto tcp
remote www.yjsec.com 1194
remote-cert-tls server
auth-nocache
resolv-retry infinite
nobind
persist-key
persist-tun
ca ca.crt
cert xww2008.crt
key xww2008.key
cipher AES-256-CBC
comp-lzo
verb 3" > xww2008.ovpn

sz -y xww2008.crt xww2008.key xww2008.ovpn ca.crt

文章评论